
Floss Your Teeth Correctly!
Are you looking to up your flossing game for a healthier, brighter smile? Proper flossing is essential in maintaining good oral hygiene, yet it’s often overlooked or done incorrectly. Our Staten Island dentists are here to guide you in mastering flossing with our step-by-step guide on how to floss your teeth which covers everything from choosing the right dental floss to solving common issues.
Say goodbye to gum disease, tooth decay, and bad breath as we reveal the secrets behind effective flossing techniques.
Choosing the Right Dental Floss
When choosing dental floss, make sure to consider factors such as thickness, texture, and flavor. There are several types of floss available, including flavored, waxed, and wider-width flosses. Waxed floss, for example, is designed to glide more easily into the spaces between teeth or restorations. On the other hand, wide floss is effective for cleaning around bridgework and protecting gum tissue.
Achieving optimal oral hygiene relies heavily on the daily practice of proper flossing techniques. No matter which type of floss you choose, consistency is key in removing plaque and polishing tooth surfaces to keep your mouth healthy and fresh.
Preparing Your Floss
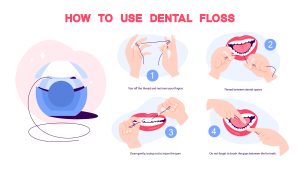
When preparing to floss, start by cutting an 18-inch piece of floss. This length allows you to wrap the floss around your fingers, leaving a small section to work with.
To wrap the floss around your fingers, follow these steps:
- Begin by winding a few turns around the middle finger of your dominant hand.
- Take the remaining fabric and wrap it around the middle finger of your other hand.
- Secure it with a knot.
This technique allows you to unspool clean floss from your off-hand while wrapping the used floss onto your dominant hand.
Using both index fingers is effective for reaching the lower molars, while both thumbs are useful for accessing the upper molars. The thumb and index finger are an effective combination for flossing both the upper and lower front teeth. This grip can also make it easier to get to all the harder-to-reach places between teeth.
Proper Insertion Technique
To prevent gum damage, use a gentle sawing motion when inserting floss between tight gaps, as recommended by dental hygienists. Unwaxed floss is easier to maneuver while flossing, making it a popular choice for many people. However, if you prefer waxed floss, it can still be used effectively with the proper insertion technique.
While flossing, avoid common mistakes like tightening your lips and cheeks. This can contribute to periodontal disease. By maintaining a gentle, sawing motion, you’ll ensure a comfortable and effective flossing experience.
 The C-Shape Method
For effective flossing, the C-shape method is recommended. It involves curving the floss around each tooth in a C-shape motion, which helps in removing plaque and debris from teeth and gums.
To use the C-shape method, gently insert the floss between your teeth and then curve it around each tooth. This technique is beneficial for reaching all tooth surfaces and promoting overall oral health. Remember to floss gently and use a new section of floss for each tooth. Don’t forget to floss your teeth between all teeth, including the back molars, for a thorough cleaning and a healthier smile.
Cleaning Tooth Surfaces
Once you’ve mastered the C-shape method, the thorough cleaning of tooth surfaces is the next crucial step. Rub the floss up and down against the tooth and under the gum line to remove plaque and debris.
Slide floss gently against the tooth surface up and under the gum line. Stop once you experience light resistance. This motion will help remove plaque and food particles, preventing gum disease and cavities.
As you clean each tooth, listen for a squeaky clean sound, which indicates thorough cleaning. With practice, you’ll become more efficient at flossing and maintaining a healthy smile.
Flossing With Braces or Large Spaces
Those with large spaces in their teeth or ones who wear braces may find it more challenging to floss. Fortunately, certain tools may be helpful, including:
- Floss threaders
- Water flossers
- Interdental brushes
To use a floss threader, guide the floss through the threader and then insert it through your braces or large spaces between teeth. For a water flosser, direct the water jet between your teeth and braces. For an interdental brush, insert the brush between your teeth and braces, then move it back and forth.
If you don’t have access to specialized floss or tools, regular floss can still be used effectively. Wrap the floss around your index fingers and insert it between your teeth and braces, moving the floss up and down for optimal results.
Common Flossing Issues
Occasionally, flossing can lead to discomfort, bleeding, or challenges in reaching certain areas. If you experience any of these issues, try adjusting your technique or experimenting with different types of floss.
For a more comfortable flossing experience, create a loop with the same length of floss and place your fingers (excluding thumbs) inside the loop. Use your index fingers and thumbs to move the floss around your teeth. Experimenting with various floss types, such as waxed or unwaxed, may also help alleviate discomfort.
If you continue to experience persistent discomfort or bleeding, contact our [Location] dental professionals for advice and assistance. They can provide guidance and help ensure your flossing technique is effective and safe.
When to Visit the Dentist
If you experience persistent pain or bleeding while flossing, visit the dentist as soon as possible. Regular checkups and professional teeth cleanings play a significant role in maintaining good oral health. They can help identify and address any dental issues that you may be facing.
Delaying consultation with a dental professional can lead to persistent pain, bleeding, and detrimental effects on your dental health. Don’t hesitate to seek help if you need guidance or assistance with your flossing routine or other dental concerns.
Frequently Asked Questions
Is it better to floss before or after brushing?
It’s equally effective to floss before or after brushing your teeth. The key is to make both activities a part of your daily oral hygiene routine. Some people prefer to floss before brushing to remove debris from between teeth and along the gum line, making it easier for the toothbrush to clean these areas. Others choose to floss after brushing for a fresher feeling.
Is floss supposed to go under your gums?
Flossing is primarily intended to clean the spaces between your teeth and along the gum line, but it shouldn’t forcefully go under your gums. The goal is to gently slide the floss between your teeth and then curve it against the side of each tooth in a C-shape, moving it up and down to remove plaque and food particles.
Visit Our Dentists Today!
Creating a habit of flossing each day is crucial for maintaining a healthy, radiant smile. By choosing the right dental floss, preparing it properly, and using the C-shape method, you can ensure a thorough cleaning of tooth surfaces, prevent plaque buildup, and reduce the risk of gum disease and cavities.
If you’re looking for a general dentist in Staten Island, contact our dentists today by calling (718) 948-5111 for an appointment.


 The C-Shape Method